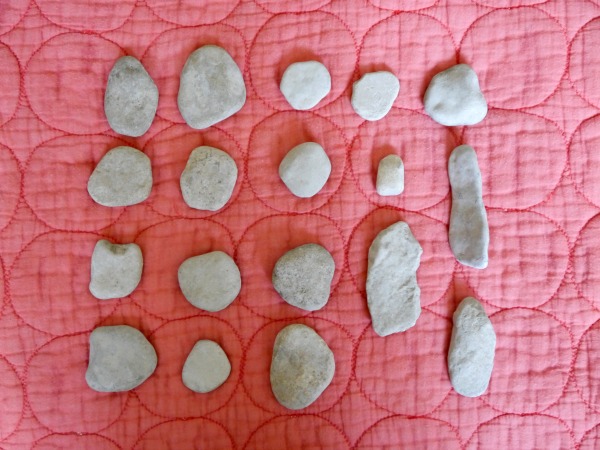
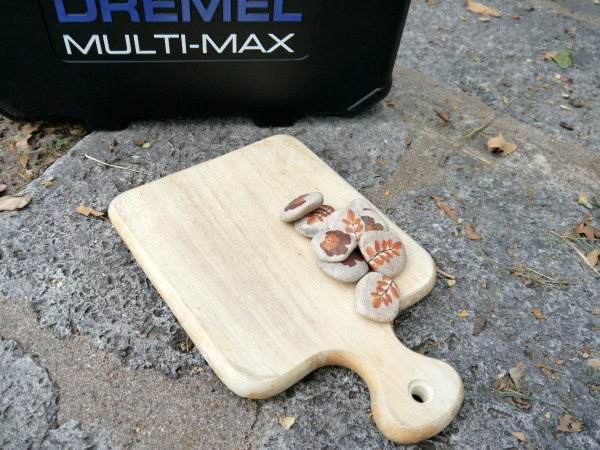
Andy’s mama was in town for a week, and we did lots of fun things including hiking on the greenbelt. If you follow me on instagram, you might remember this picture. The greenbelt was dry in this particular spot, so I took the opportunity to rock hunt. The rocks were all the same color and round and flat. They were perfect for a DIY tic tac toe board set I’d been wanting to make!

You only need 10 rocks, I’ve got some fun plans for the others!
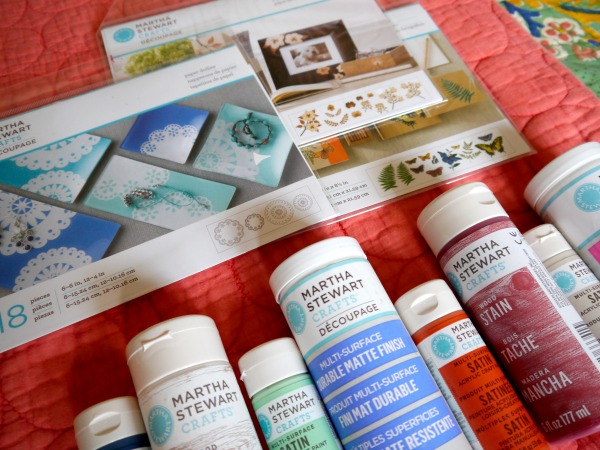
 DIY Tic tac toe materials
 DIY Tic tac toe materials
- 10 flat rocks
- Martha Stewart Crafts Decoupage paper cutouts
- Martha Stewart Crafts decoupage
- paint brush
- old cutting board paint
- painters tape
- sand paper
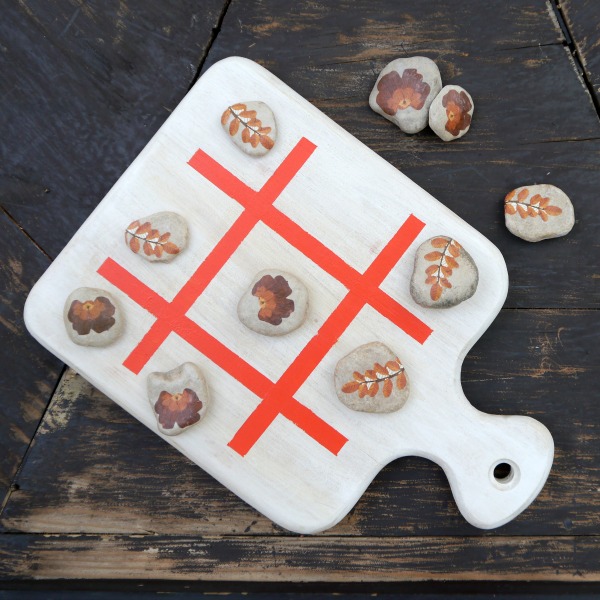
How to make a DIY outdoor tic toe set
Step 1- Gather river rocks
You need 10 rocks total. It’s best if they are flat and round, but any rocks will work. You need 5 of one image and 5 of another.
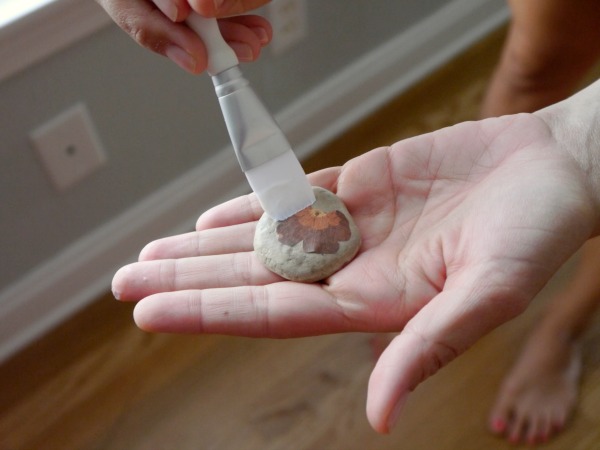
Step 2- Decoupage
This is really easy to do, punch out the Martha Stewart cutouts and apply Mod Modge or decoupage to the rock and the back of the cut out. Brush it on, and make sure to brush out all of the air bubbles.
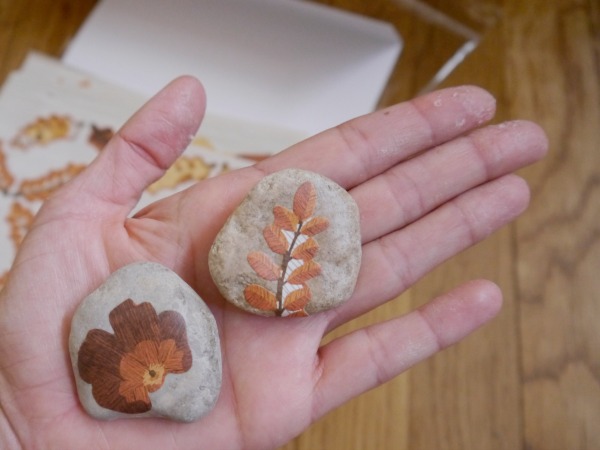
 Here are the 2 cut outs I decided to use:
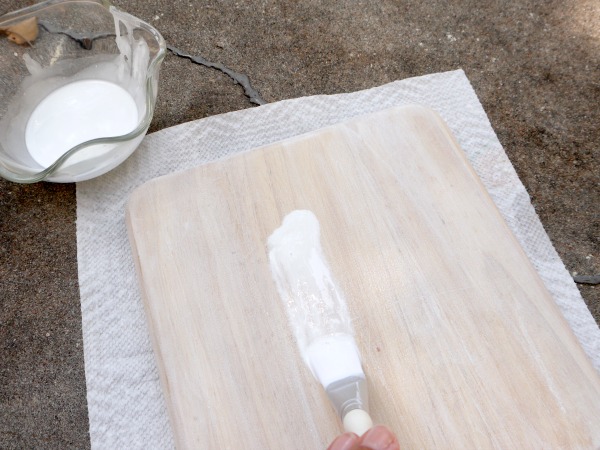
Step 3- Prepare cutting board
I found this crusty cutting board at a thrift store for $2. I used my handy Dremel to sand her down.
I whitewashed the top of the board. White wash is fancy for watered down white paint, ha!
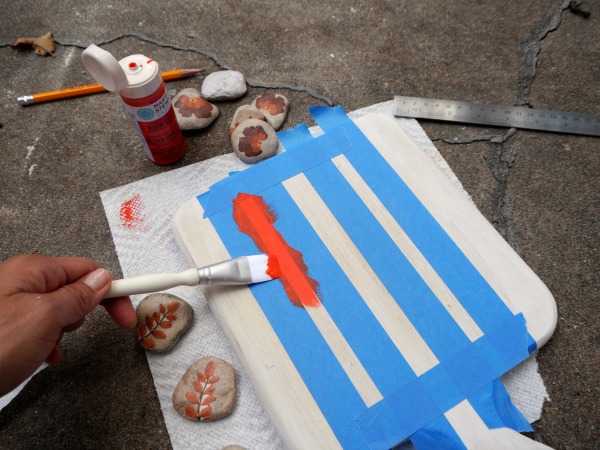
Step 4- Measure
Then I measured out my tic tac toe lines and taped them off with painters tape.
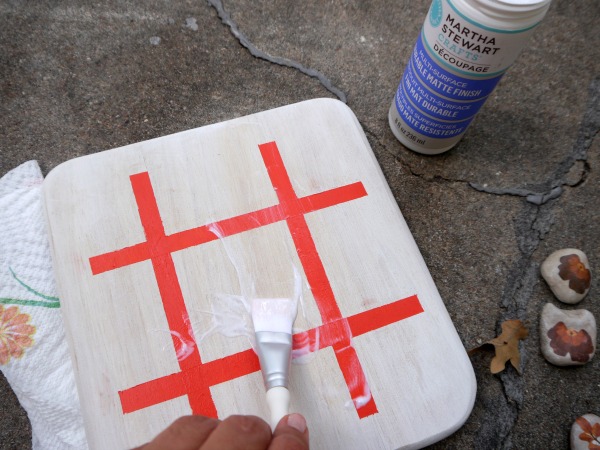
Step 5- Seal the board
Next, decoupage over the whole thing to seal it, and voila… you’ve got an outdoor tic toe set!
Set her on your outside table, and watch the happy tic tac toe players come along!
For more outdoor game tutorials, don’t miss:
Have you ever made a tic toe set? I’d love to hear…

Comments & Reviews
This is great. Now I have the idea to make mine 🙂
Great idea! Love it! Thank you very much for joining in the celebration of #purebloglove, we enjoy having you each week. I hope to see you on Thursday at 8PM, EST through Sunday night. ~Cydnee
Thanks for sharing at the Inspiration Spotlight party! Hope to see you again soon. Pinned & Shared…
What a fantastic idea! So creative. I love that you went with something different than the traditional x’s and o’s. Using the leaves and flowers was such a great idea!
How cute! Totally loving this idea!! Thanks so much for sharing at the Create & Share Link Party. Hope to see you again tonight (7:00 PM MST)!
What a cute project! Love the upcycle! Thanks for linking up at Oh My Heartsie Girl WW!
This is adorable! Not only a fun game…but a beautiful piece of art. 🙂
This is a great idea and would make a great gift! Stopping by from the Pretty Pintastic Link Up!
LOVE this idea! How creative! What a great project for the kids and I do to as we wait for spring to come! 🙂
Saying hello from Freedom Fridays!
Cathy
This is such a great idea! :)This is something my seven year old would love.
This is such a cute idea! It’s very creative and my girls would love it!
How cute Jamie! I shared this on Facebook and it was a hit! https://www.facebook.com/CraftsbyAmanda/photos/a.353593675216.349539.323548680216/10154348523480217/?type=1
So much fun. Great use of an old cutting board!!
Super cute, Jamie!!! Saw this over on Craftgawker 🙂 Pinning and Stumbling! xo
Love it! I think this would also be an awesome idea for a cheese board. If the board was painted as instructed and then sealed in Danish wood oil, it would be food-safe. Tic-tac-toe with cheeses!
Tic tac toe with cheese… SO FUN!
This is great. We have lots of visitors coming this fall and I can see this being a fun outdoor activity in the evenings!
Thanks for sharing.
Amy
Wow, so cute, love it!
Great idea!
love this! Too cute.
So fun! x
I just love this project! What a great idea!
So cute! I love this idea!